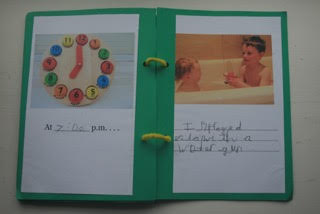
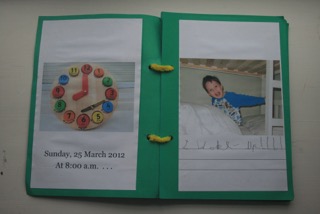
 A few years ago, in a desperate bid to get my son (a.k.a. the family’s writer-in-resistance) to put pencil to paper during the l-o-o-o-ng Easter vacation, I suggested that we make a book about a day in his life. We took a photograph every hour from breakfast until lights out, along with photographs of his toy wooden clock showing the correct time.
Then, we printed off the photos and glued them into a makeshift book. Alistair wrote out a sentence of text a day over the next two weeks.
When the oeuvre was finally complete, we re-read it at bedtime every night for a week and then returned it to his bookshelf.
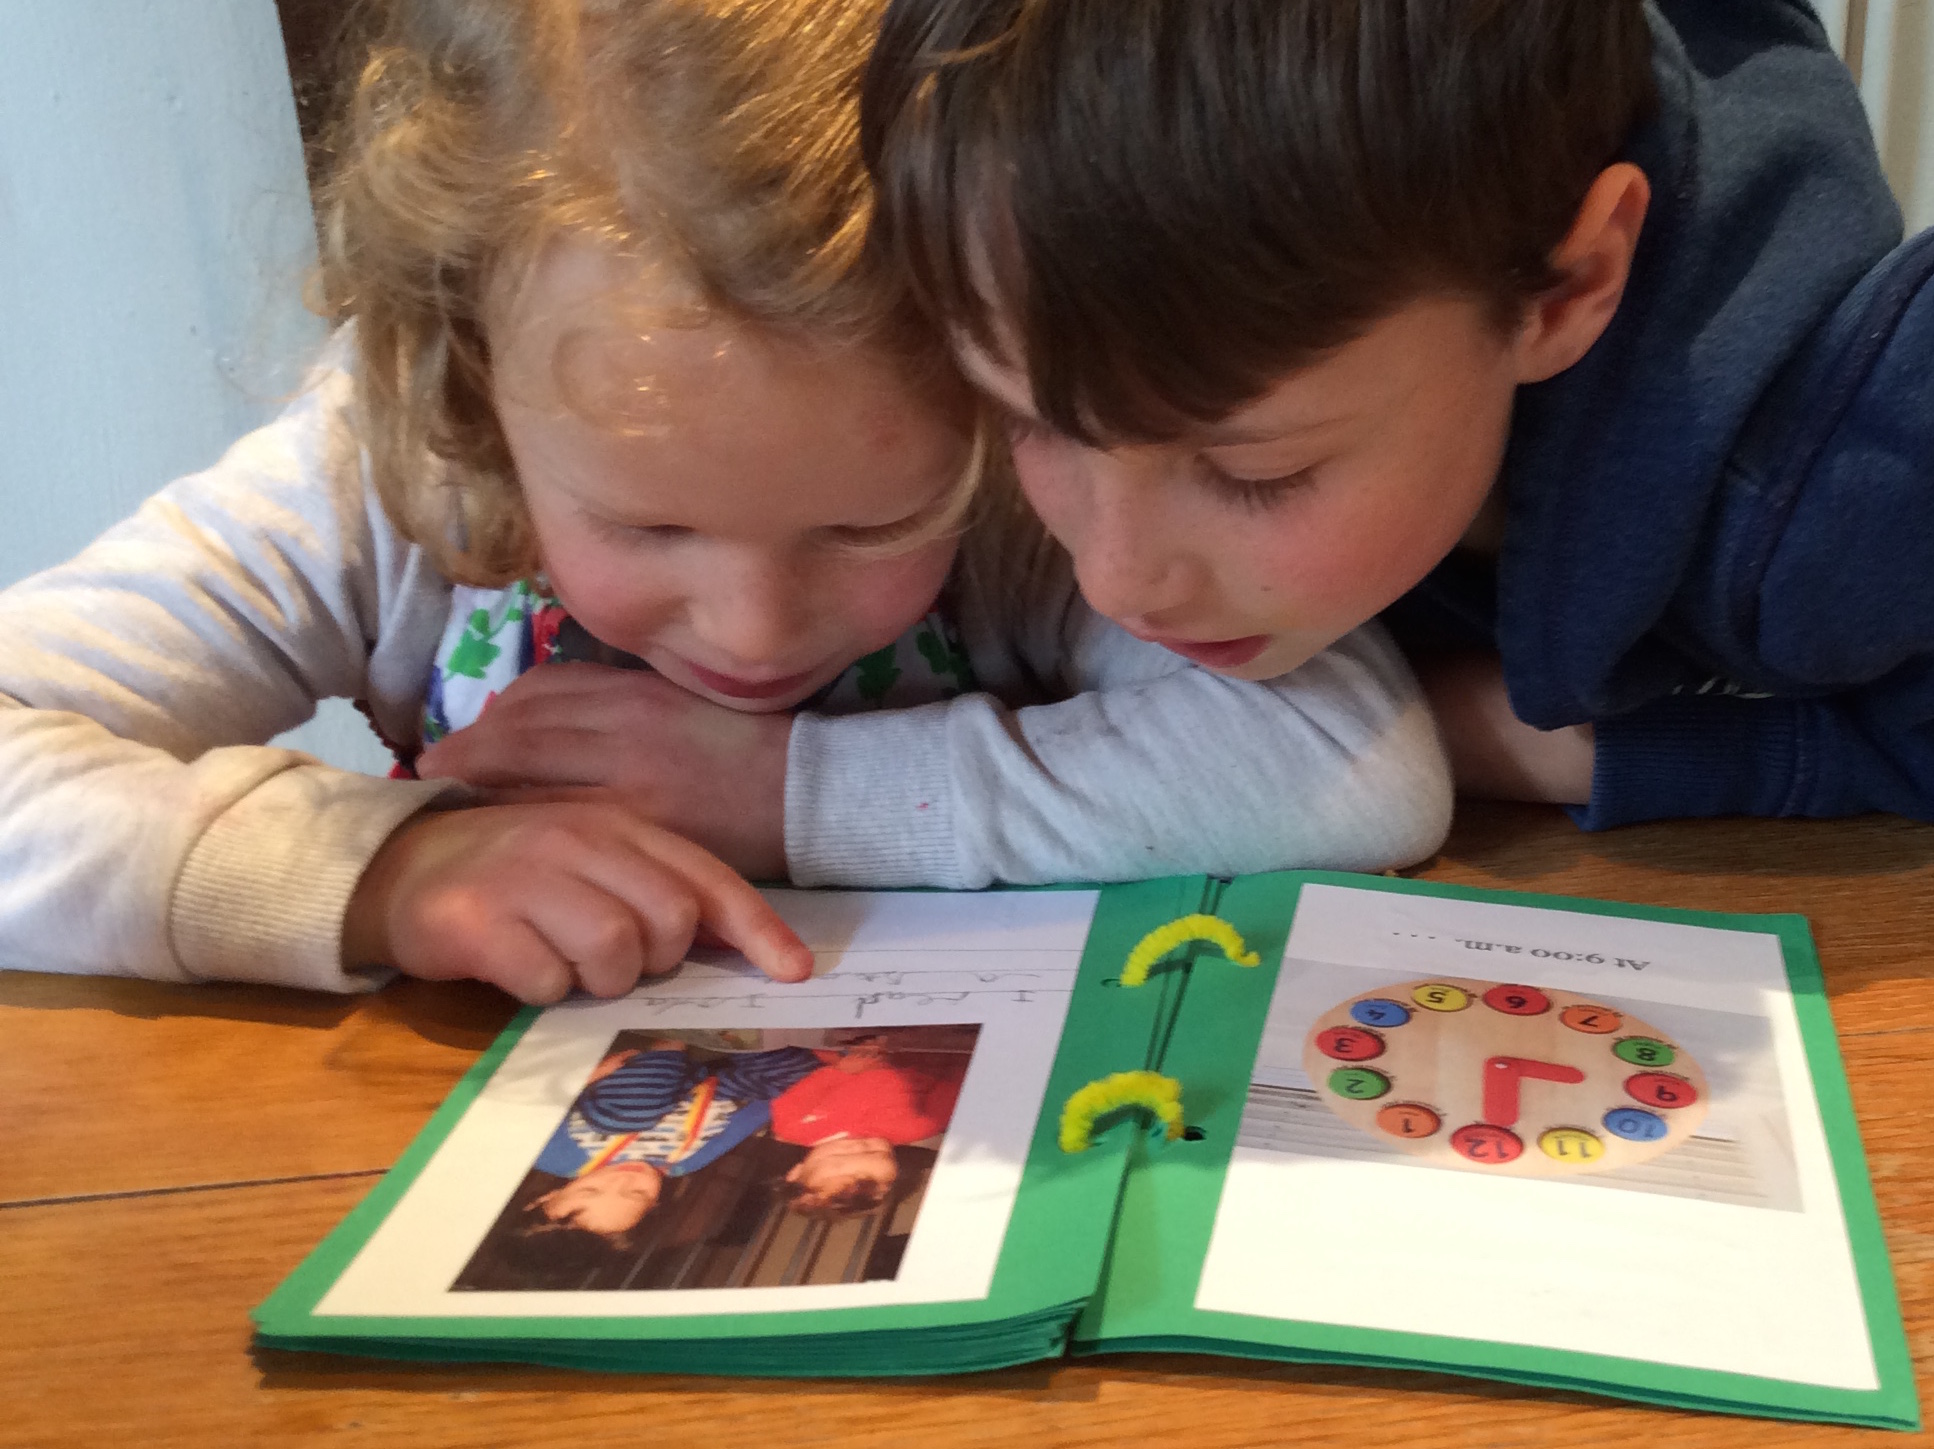
 Where it stayed until his sister discovered it a few years later, and was enchanted to see a younger version of herself cast in a key supporting role (primarily as the water gun target — but as a younger sister, she’s adaptable). Isla was so eager to show this opus to her nursery teacher that she forgot to have her daily pre-school tantrum, and discovered, to her surprise, that she rather liked school after all.
For my part, I can’t resist leafing through it whenever I’m straightening the bookshelves. With my firstborn on the cusp of adolescence, I now realise that this record of the early years was the best possible gift I could have given to my future self. Because at age five and a half, every minute of the day is a highlight. And we captured fourteen of them.
There are countless ways to make a day-in-the-life book. I provide instructions below for our version, which was fit-for-purpose, and could be assembIed within the time constraints imposed by a 5-year-old’s attention span and the buzzing schedule of a working parent.
What Age?
This activity works well with an early writer (age 5-6 in the UK). An older child could write about the photograph in greater detail, and a younger child might wish to dictate the text to his trusty parent-scribe. Siblings might also co-author a book.
Instructions
Materials and Equipment
- Digital or smartphone camera
- Colour printer (or develop the photos at a shop)
- A5 cardstock or thick construction paper, any colour (or A4 sheets, cut in half, length-wise). The North American equivalent to A4 if Letter-sized paper.
- Black card stock for making the hands of the clock on the cover
- A4 white or lined paper, cut in half, length-wise
- Scissors
- Glue stick
- Hole Punch
- Compass or other object with a sharp point for making a hole in the clock face.
- Split pin (called a paper fastener in North America)
- Pencil or pen. If your child prefers to write in pen, an erasable, such as a Pilot Frixion is best.
- Chenille pipe cleaners
- Toy clock (optional)
What to Do
- Explain the project to your child, and agree on a day for the photoshoot. I went for a typical day on a weekend, so that we would record our usual routine.
- From the time your child wakes up, take a picture every hour on the hour. Setting an alarm on your smartphone helps.
- Optional: Also photograph a toy clock showing each hour of the day, or use some other method to show time.
- Print off the pictures so that each fits on one side of A5. You could insert the photographs into a Word document and produce writing lines beneath, using the table function, then the pages off two pages to a page, to get the right size.
- Cut and paste the photographs onto the cardstock or construction paper, so that the correct clock face is opposite the relevant photo.
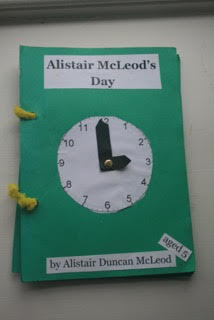
- Make a cover with a title. I added a clock with moving hands onto the cover, which was a hit with the kids. Clock face printables are widely available on the internet, including via this link. Fasten the hands to the clock using a compass to make a hole, and a split pin to secure.
- Assemble the book by punching two holes in the side, threading a chenille pipe cleaner through each hole, and twisting the pipe cleaner into a ring.
- Date your project. You’ll want to remember when you made it.
- Now the tricky bit . . . Convince your child write a sentence to describe each photograph.
- Re-read your manuscript 10,456 times. Then either stash it somewhere safe or gift it to a grandparent or other relative.
Collective memory.
Have you made books with your children?
I would also love to see pictures to post for inspiration.
If you try this project, or other book-making projects with the children in your life, please send photos to joanna.norland@gmail.com
Comments are closed.